PiHole: Ad- and tracking-free browsing for everyone on your home network

What if your home network could just swallow all ad-related requests for everyone using it?
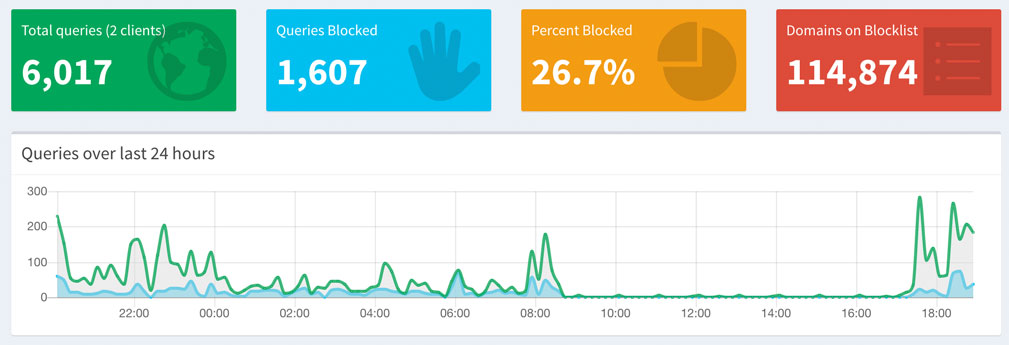
Let’s start by having a look at the summary of the PiHole web console below. When I first looked at these numbers I was certain that it must be due to some misconfiguration on my end, but looking deeper into the list of blocked URLs it became clear that on a normal day around 30% of all DNS requests don’t make it through PiHoles massive blacklist.

So what does PiHole actually do? Have a look at this GitHub repo SteveBlack/hosts, which is essentially a list of various hosts files containing a huge selection of ad-related urls that are all resolved to 0.0.0.0. This means that whenever you request one of the urls in that list, the request does not even leave your machine. While this method will do the job of “swallowing” all spam urls it has two disadvantages:
- The
/etc/hostsfile will need to constantly be adjusted to reflect recent changes in the hosts lists - This solution would have to be manually set up on every single device and is more tricky on mobile devices
PiHole, if installed on a single device within your home network, will take care of that. The main goal is to set it up as a local DNS server that will be used by all devices in your network.
Prerequisites
- A router that lets you define a custom IP for making DNS queries
- A device that is always running which we will install PiHole on and redirect all DNS-queries to
Installing PiHole on your device
I had a Raspberry Pi 2 Model B with Ubuntu Server installed. If you have a Raspberry 2 or 3 lying around you can find more info on how to install Ubuntu here. Other operating systems will work equally, just keep in mind that all of the following commands reflect the workflow on Ubuntu on a Raspberry Pi 2.
From there it is as simple as running
curl -sSL https://install.pi-hole.net | bash
You will be guided through the rest of the installation by a graphical interface.
On the first screen you are being informed that your device needs to have a static IP-address. This is important, as all DNS traffic will be routed to the same IP address and all network devices will rely on it. Some routers support this behaviour and use DHCP to assign the same IP address to devices. If this is the case, it is unnecessary to change anything.
The next step requires us to chose an Upstream DNS server. As PiHole does not only handle the blocked DNS queries but also needs to forward all ad-free requests somewhere, we have to select an existing service to take care of that. Cloudfront works great for me, but it is best to do your own research on which DNS provider to select.
Up next is a list of all lists which contain blocked URLs with a recommended pre-selection. I went all-in and left every list selected. Should you encounter any unwanted blocks afterwards, you can easily disable any list or even unblock specific URLs at a later stage.
When asked if IPv4 and IPv6 requests should be handled, I selected both.
The next steps will guide you through the process of enabling the PiHole web-interface which I highly recommend installing. If you are lucky, you are not running another http-server on your device. In that case you can simply chose to install the recommended one. If you are unlucky and want to stick to your old server, you will have to adjust the PiHole config to work with it. Check out this post to do this with Apache.
Once this is done, you will be presented with some final information on how to reach the web-interface and which password to use.
Running PiHole
Back in familiar territory run the following command to run PiHole, and enter a password of your choice:
pihole -a -p
You will find the fresh new web-interface running at http://[your-ip]/admin. If found the interface so well-designed and straight forward that it makes no sense explaining how to whitelist certain URLs and how to blacklist others.
Set your Router to use your device as DNS server
Before making this change you can actually test the functionality of PiHole by running two simple nslookup commands on a different machine on your network.
nslookup analytics.yahoo.com [ip-address-of-pi-hole]
will resolve to a local IP address, since it is a blocked URL.
nslookup yahoo.com [ip-address-of-pi-hole]
however should return the actual IP-address of the requested website.
If this seems to work, the last task is to set your networks router’s primary DNS to the IP of the device you installed PiHole on. Once this is done you should be all set.
